I’ve been working on creating a clone of a Jason Huggins’ tapsterbot, parallel robot in my spare time . I wanted a friendly desktop robot that I could play with to prototype some computer vision applications. Jason was kind enough to open source the code, the BOM, and and all of the design files in a handy github repo. To build the robot I got a membership to the All Hands Active hackerspace here in Ann Arbor so I could fab the parts. All I really needed to build the robot was a 3D printer and a laser cutter. The robot has a really simple design that only requires a few nuts and bolts, three $8 servos, and an arduino for the controller. Once I got the parts it took me a little over a day to build the thing. I had a few slip-ups along the way so I wanted to collect all my knowledge in a blog post. Jason provided me with a ton of awesome photos of the robot in action so I could figure out how to piece it together. One critical component was how to correctly mount the robots arms onto the servo. Jason has provided an awesome video that shows you how to do just that. I now have everything assembled correctly and I plan to take it all apart and provide step by step instructions on how to put everything together. Currently the robot runs using node.js and I am making a python port using PyFirmata. With any luck I should have that work done within the next week and be able to show some more impressive demos. The first thing I want to do is build a path planning algorithm so I can prevent the tapsterbot from accidentally crushing its own arms or swinging into the legs that support it (I’ve already broken an arm). I’ve been reading up on the robot’s inverse kinematics, but I am not sure it lends itself to a closed form solution.
Tapsterbot Mark I
July 10th, 2013 | Posted by in automation | Automation Alley | demo | Fun! | pics or it didn't happen | python | robots - (Comments Off on Tapsterbot Mark I)Solving Autostereograms AKA Magic Eyes
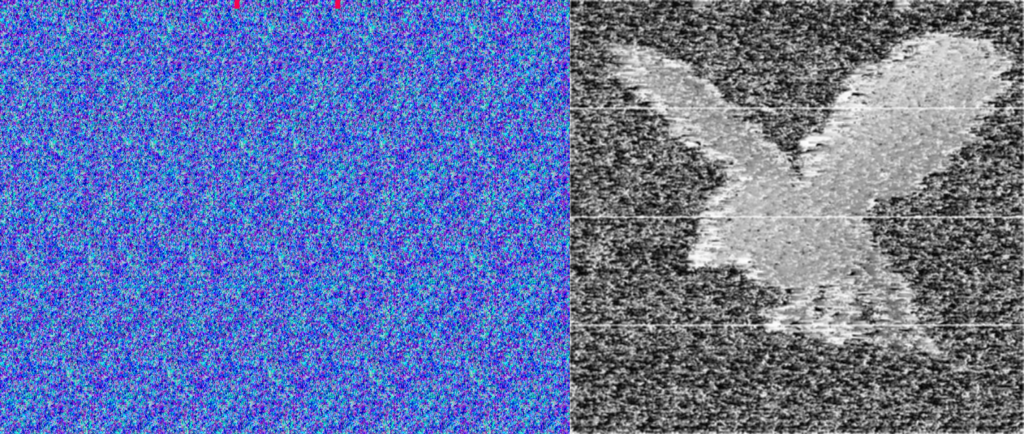
July 10th, 2013 | Posted by in birds | computer vision | demo | Fun! | OpenCV | pics or it didn't happen | python | signal processing | SimpleCV - (Comments Off on Solving Autostereograms AKA Magic Eyes)This week I’ve been playing with autostereograms, also called magic eye images. MagicEye images were big in the 90s when I was a kid/teen and every mall had a kiosk peddling framed copies. I wanted to see if I could reconstruct the depth map from the image using a little bit of image processing. Autostreograms work because your eye/brain is really into creating stereo depth maps, and if you set your eye’s focus at a point behind the image your brain basically goes a bit haywire and tries to build a depth map in the plane of the image. Getting your vergence point to sit behind the image plane requires some practice; so if at first you don’t see the image keep trying. I really recommend reading the wikipedia article linked to above as it is really well written with a lot of fantastic diagrams.
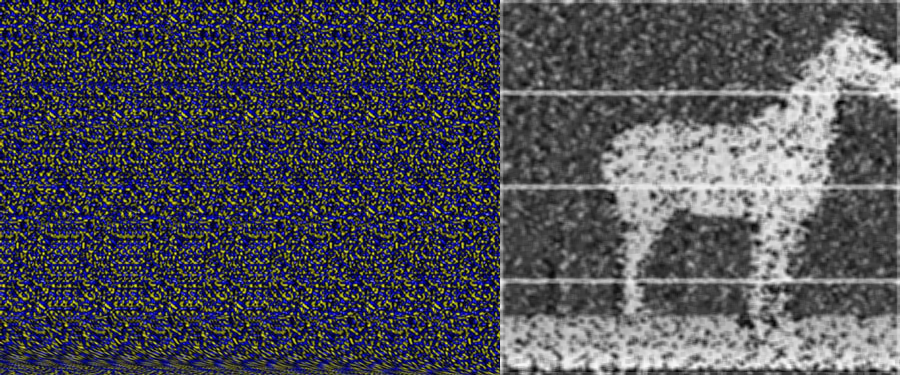
To do this project I created a small data set of “wall-eyed” random-dot autostereograms. There are other kinds of stereograms, that can be viewed in different ways, but I felt the random-dot ones would be slightly easier to decode. The basic premise is that for every small set of horizontal pixels there is a corresponding row of pixels some distance away. The distance between the matching rows segments is what your brain uses to get the depth map. The matching of the rows of pixels is periodic with a period related to the vergence distance you must view the image at. Figuring out the period of the image is easy, if you look at the image you can basically see columns of pixels. For most autostereograms there are usually between 6 and and 20 for a normal image, the horse image above has seven instances of the repeating patern. If you have an image that is 600 pixels wide, with about six columns, the pixel, or set of pixels at [0,0] will have a correspondence at roughly [100+d,0], where the value of d is the depth value.
I baked up a naive algorithm in about 90 minutes and had an early prototype. The basic idea is that you iterate over the rows in the image, and for a small chunk of pixels in that row (roughly ten pixels) you search a window around where the correspondence should exist, and then record that value in a depth map. So for our example image 600 pixels wide, you would try to match pixels [0:10,0] with [100:110,0], [101:111,0] and so on until you found a decent match. For my first example I used the gray scale sum of absolute pixel differences. You could do a correlation, but I thought that the simple solution should suffice. It is worth noting that you can also move up to frequency space and do a multiplication of the spectra but that seemed like a lot of work. I googled a bit and found this example that does just that. That solution seems to get stronger edges, and work on a few different kinds of stereograms, but I would argue mine gets betters depth maps.
My first pass, using naive python looping worked but it was as slow as molasses in January. I decided to see if I could speed things up. The first speed hack I tried was to use an integral image. An integral image is an image where each pixel is the sum of the pixels above and to its left. Integral images are great if you want to calculate lots of different average values across an image really fast, and they are what makes Haar Cascades and face detection possible. In an integral image, once the integral is computed, the sum, and average of any area in the image can be computed with in just four look-ups, and three additions, which is a decent time savings. I modified my code and got maybe a 10-20% speed up (I didn’t bench mark it). Since the operations are done row-wise and each row is independent of the next one this algorithm is really well suited to parallelization. I decided to try my hand at doing some image processing using the python multiprocessing library. It took me about an hour to chunk out the code and get everything running, but it did improve performance significantly (a little less than 4x). I need to go back and refactor the code to deal with some bounds issues, which is causing the horizontal lines in the image, and perhaps use shared memory, but the results are well worth the effort. You can take a look at the code for yourself at this repo, I’ve put a gist of the code below for reference.
If I get some more time I want to see how much of a speed up Numba can get the naive implementation and possibly do some bench marking of the different approaches. I also need to remove the banding caused by the multiprocess “chunking.” The algorithms performance seems to be very dependent on the search window size so I would like to find a more robust way of determining the size of the search window, possibly by looking at low end of the FFT spectrum.
Web Scraping with BeautifulSoup and Python
July 1st, 2013 | Posted by in Ann Arbor | artificial intelligence | audio | birds | classification | code | Fun! | machine learning | Michigan | python | signal processing | Uncategorized - (Comments Off on Web Scraping with BeautifulSoup and Python)I’ve been working on building an automated bird call recognition system using python. The first step in getting everything working is to pull down a data set of bird calls from which to train and test my ideas. To get this data I needed a lot of bird calls. It just so happens that there are a couple of large repositories of this type of data including the Xeno-Canto library and the Cornell Ornithology Library. The only problem is that it lives in websites with embedded players and I need the raw data. I decided to try and write a basic web-scraper that would pull down the data I wanted. To do this I first created a list the scientific names of all of the song birds that I am pretty sure live in my neighborhood (at least the common ones I’ve seen before). I checked a couple of websites to cross check my assumptions and developed the following list:
- Cyanocitta cristata – blue jay
- Cardinalis cardinalis – cardinal
- Zenaida macroura – morning dove
- Turdus migratorius – robin
- Turdus migratorius – robin
- Carduelis tristis – gold finch
- Passer domesticus – house sparrow
- Quiscalus quiscula – common grackle
- Archilochus colubris – ruby throated humming bird
- Picoides pubescens – downy wood pecker
- Columba livia – rock pigeon
- Sitta carolinensis – white breasted nut-hatch
- Poecile atricapillus – Black-capped chickadee
- Agelaius phoeniceus – Red-winged black bird
- Haemorhous purpureus – Purple Finch
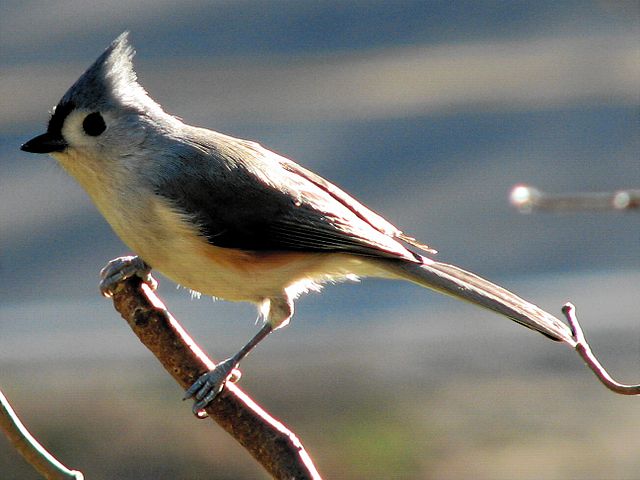
- Baeolophus bicolor – tufted titmouse
To do the scraping I used the BeautifulSoup python library to help me navigate the DOM from xeno-canto bird library. The code works by crafting a query for each bird species, and parsing the DOM to look for the xc-button-audio in a div element. In that div element there is a sub tag called data-xc-filepath which points to the mp3 file URL. My friend Ben helped me figure out that last little bit as I am barely competent as a web money. Once I have the mp3 file URL I use os.system to call wget on the mp3 url. I also do some book keeping to keep all the bird calls in different directories and navigate the multiple pages of results. If I get some more time I will try to extract all of the metadata and save it to a CSV file, but for right now this works. You can see the code below:
Now that I have the data I need to figure out how to extract individual calls from each file that can contain multiple calls. My working idea is to look for regions where the peak-to-peak audio values are low enough to be considered silence. I will use these silence intervals to split the files into individual calls. Once I get to the short individual calls I am thinking I will run an FFT over the audio and then bin different regions of the spectrum to create a feature vector. I will also probably keep some information about the call length and maybe try to determine the “warblyness” of the call (i.e. how many different sub-tweets make up a call). I am thinking that it may be useful to do the binned FFT over fixed time slices of the call and calculate the FFT on that (e.g. break the call up into five time chunks and get the FFT values for each chunk). I have an idea that a binary descriptor can be used to compress each time slice if I set an appropriate threshold at each frequency (e.g. use a 32 bit int to encode if one of 32 chunks the frequency space are discernible). If I can get that idea to work I could probably encode each call very succinctly in only a few bytes of memory. Once I have my data I suspect that a K Nearest Neighbors classifier will work reasonably well. I may combine the KNN with a final correlation with the truth data to choose between the K best matches.
DRAGON BOT IS GO!
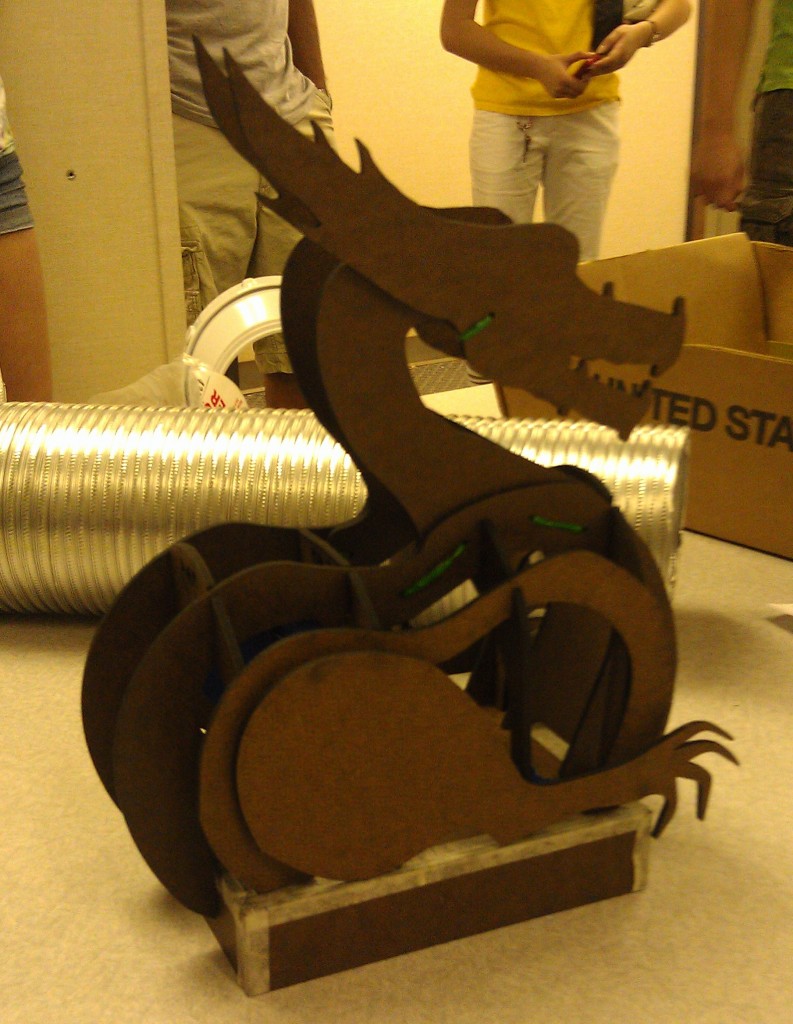
July 1st, 2013 | Posted by in audio | demo | Detroit | Electronics | FIRST | Fun! | Maker Faire | pics or it didn't happen | RaspberryPi | robots - (Comments Off on DRAGON BOT IS GO!)FRC 830 has been collaborating with FRC 3322 to build a giant dragon robot for Maker Faire Detroit. I just got back from my trip and a chance to check in with the kids. The goal is to have a giant robot that plays sounds, shoots smoke rings, drives, lights up, and has animatronic eyes and eye brows. The students have prototyped an eye assembly using some servos controlled by the PWM ports on the cRIO side car. The eyes are controlled using the analog joy sticks on the gamepad. After a little bit of debugging we were able to get the animatronic eye assembly running this afternoon.
Another one of the students was able to build a small GPIO driven relay system to control the smoke machine which we plan to power using a second battery and a car inverter. In my spare time this week I was able to cook up a client-server system using RabbitMQ and get it running on the RaspberryPi. The only real trick was setting up the RabbitMQ conf file to run on the space constrained RaspberryPi. This is a little bit outside the scope of the kids ability, but now that I have a sketch working they should be able to take over. The hope is that we can use PyGame and ServervoBlaster to control the lights and sounds on the robot. I want to roll a GUI front end for this using pyGTK. The result looks like this (I now have the GTK gui running).
Mwaaaaahahahha. by @kscottz


